Tuesday, March 26, 2013

Chapter 5

Name:
Alina Cancel
Student Number:


GIMP: Chapter 5: Selection
PART 1: READ Chapter 2 in the GIMP book, then:
  1. Answer all questions below, briefly but completely.
  2. Change the color of the answer to BLUE.
  3. Copy this information and paste in a new post in your DIGITAL GRAPHICS blog.

1.      Why are the GIMP Selection tools important? Because it makes thing much easier grab the item needed.

2.      What is meant by the “marching ants”? Black- and- white shimmering dashes the outline a selection. 

3.      Describe the following terms found in the SELECT menu:
·         All select the whole image
·         None make sure nothing is selected
·         Invert reverses the selection
·         Float cuts out a selected area and pastes it as a new floating layer.
·         By Color switches to the Select by Color tool
·         From Path converts the current path to a selection.
·         Feather makes the edges of the selection fuzzy.
·         Sharpen makes a fuzzy selection sharper
·         Shrink and Grow make the selection larger and smaller
·         Border replaces a selection with a color or pattern using the Bucket Fill Tool to create an effect much like stroking the selection.
·         Rounded Rectangle rounds the edges of a rectangular selection.
·         To Path converts a selection to a path
4.      Why would you want to SELECT BY COLOR? So I can separate the foreground from the background.

5.      What is a BEZIER PATH? Let’s you define control points outlining your object. Then it connects the dots to create a path.

6.      What is the purpose of the INTELLIGENT SCISSORS? It tries to follow the boundaries of an object to make selection

7.      What is the purpose of the QUICK MASK? Let you see the selection visually superimposed on the image instead of the usual “ marching ants” view

8.      What is the purpose of LAYER MASKS? Defines how much, and which parts, of a layer will be visible.

9.      What is the purpose of SIOX? Simple Interactive Object Extraction is a foreground select to tool

10.  When is using SIOX most effective? When the image has significant color differences

NOTE: For an excellent  review of GIMP Selection tools, check out: http://www.quackit.com/web_graphics/gimp/tutorial/gimp_selection_tools.cfm
Scroll down the page to see an excellent chart of the Selections tools.

PART 2: GIMP PROJECTS:
1.      Go to the web site for this book: http://gimpbook.com
2.      Look through the menus on the left to see the supplemental information provided for you about the book.
3.      Click on the PHOTOS FROM THE BOOK link, and scroll down to see the images for Chapter 5.
4.      Download and save these images: Montara plant (first image), Saturn, Audubon warbler (bird with tree branches),  Mauna Kea (telescope building, image after bird images), dark pink flowers,  and dog
5.      Using the appropriate images, practice the SELECTION tools indicated on pages 164-212.
IMPORTANT NOTE: For many Selection tools, you must press ENTER after using the tool in order to actually select the object.
6.      For each image, once you have completed the selection using the indicated tool, copy the selection (CTRL-C) then create a new image (CTRL-N) and paste the selection into the new image (CTRL-V).  
7.      Save the new images you created from each selection.
NOTE: For the Layer Mask image, save the combined image of the ostrich-giraffe.
8.      Insert all the new images here:


Monday, March 25, 2013

Gimp: Tribal Tatto


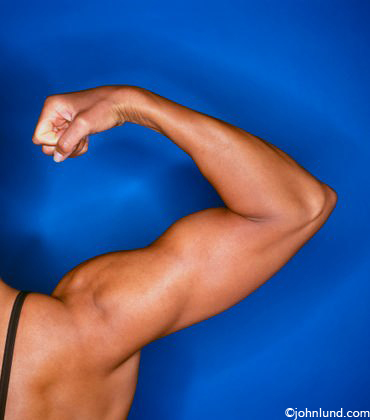
This picture i removed the black strap and lettering with the Clone tool. I used a soft edge brush to clone the skin and slowly covered the strap and lettering.  
I opened a tattoo image and selected by color and inverted; which gave me the tattoo with no background. I then copied and placed in the arm image. I closed the the regional tattoo image. The pasted image become a floating layer which then i change to a new layer. I used the rotate, scale, and move to place the tattoo in the appropriate place. I went to Mode--> Multiply--> and reduce the Opacity giving it a softer look.
I did the same as the above.

Thursday, March 21, 2013

Gimp Chapter 2

Name:
Alina Cancel
Student Number:


GIMP: Chapter 2: Improving Digital Photos
PART 1: READ Chapter 2 in the GIMP book, then:
  1. Answer all questions below, briefly but completely.
  2. Change the color of the answer to BLUE.
  3. Copy this information and paste in a new post in your DIGITAL GRAPHICS blog.

1.      What happens to an image when you SCALE it? Does the canvas size change when you SCALE an image? Yes, it make all smaller.
2.      Why should you scale images you take on a digital camera before sending them in email or posting them on the web? So the picture would load a lot faster.
3.      Why is it important to make sure the width and height of an image you are going to scale are linked together? How do you do this in GIMP? Because It prevents the contents of the photo from getting taller and skinner, or shorter or fatter. Make sure the width and height are chain liked together.
4.      What is the keyboard shortcut to UNDO? ctrl z
5.      What does the SCALE TOOL do? Let you scale interactively by going on the layer clicking on a corner and dragging into the image.
6.      What is the difference between the IMAGEàSCALE from the menu and the SCALE TOOL? The Scale tool needs to be started by user and it only works on the current. Image Scale- scales the whole image
7.      Describe these JPG quality settings:
·         Optimize gives you an additional reduction in file size without any further reduction in the image quality.
·         Progressive let you see a poor-quality version of the picture on the web right away, which gradually improves
·         Save EXIF data embeds a thumbnail of the image into a file.
·         Comment is a place to put any text you might want to add to an image.
8.      Why would you decrease the quality setting of a JPG image? So it would take less space and load faster.
9.      Compare the size of a 95% quality setting to a 100% setting of a JPG image. 95% has the quality as 100% be is two or three times smaller.
10.  If you save a JPG file at 100%, do you preserve ALL the data in the image? What formats should you use if you want to preserve all the data? No! It does not, to save without losing PNG or TIFF should be used.
11.  Describe what it means when you INDEX a file such as a GIF or PNG file. It means the files can be much smaller by reducing the number of color they use.
12.  What is RGB color mode? A Set of colors that will be represented in the final image.
13.  What is dithering?  Combines several colors in the palette to simulate colors that aren’t there.
14.  What is grayscale mode? For black and white documents or photographs, or simply for converting color to black and white.
15.  What does interlacing a file do? Allows an image to be viewed before it has been loaded completely on the web.
16.  What is cropping?  Cuts out an area that is not needed.

Briefly describe these graphic file types:
NOTE: It is important to learn these types of files to be a proficient graphic artist, so pay attention when you describe these file types.
1.      JPEG Joint Photographic Experts Group is great for full-color photographs because they are highly compressed and are encoded in full color.
2.      GIF Graphics Interchange Format, it an indexed format meaning it uses a fixed list of colors instead of encoding every color.
3.      PNG offer two modes it can be used in full color image or indexed images.
4.      XCF is a GIMP format, and should be used to keep layers and paths are other information you want to save.
5.       TIFF Tagged Image File Format is another full-color, non lossy format.
6.      Raw is a term encompassing all the various proprietary formats used by camera manufacturers.
7.      BMP it a Microsoft’s Windows Bitmap format files are quite large and don’t offer any advantage.
8.      PSD is Adobe’s Proprietary Photoshop format it saves layer and other information.
9.      ICO is a Microsoft Windows Icon Format is can contain several resolutions in one file.
10.  PDF is a vector graphics format. It a collection of drawing instructions involving points, lines and curves.

PART 2: GIMP PROJECT:
Be sure to save these images in your GIMP folder before inserting them in this document.
1.      Go to the web site for this book: http://gimpbook.com
2.      Look through the menus on the left to see the supplemental information provided for you about the book.
3.      Click on the PHOTOS FROM THE BOOK link, and scroll down to see the images for Chapter 2.
4.      Download and save these images: Red Rock Canyon (the 4th image), Canyonlands (5th image),  American kestrel (the bird), Ethan (the little boy).
5.      With the Red Rock Canyon image, apply the following color techniques as indicated in the textbook on pages 38-50 (try dragging the sliders in each dialog box to see how they change the image, then UNDO to restore the image back to the original), then DESCRIBE what each does:
·         Brightness-Contrast: let you control the images brightness and contrast but using to sliders the represent each one
·         Levels: has two set of controls Input level and output level both slider make the image lighter or darker.
·         Curves: does the same as Levels but in a different way it uses a horizontal bar graph the represents input values.
·         Threshold: shows a histogram of the image’s brightness.
·         Desaturation: removes the colors from the image, changing it to a grayscale image without requiring you convert to grayscale mode.
6.      When you have applied these techniques to the Red Rock Canyon image, apply THRESHOLD to the image, save it, then insert it here:


7.      With the Canyonlands image, use Rotation to adjust the image as indicated on pages 51-55. Save the rotated and insert here:


8.      With the Kestral image, use the Sharpening techniques indicated on pages 55-59. Save the sharpened image and insert here:


9.  With the little boy, Ethan, image, correct the Red-Eye as indicated on pages 61-66. Save the corrected image and insert here: